 Recently, we visited our local pick your own farm. We had a fantastic time spending the whole day at the farm, enjoyed a picnic together and we got to pick fresh fruits. It was a fantastic opportunity for Anjalie to see how fruits grow and also for us to enjoy fresh fruits from the farm. Among our haul was gooseberries, strawberries and raspberries. We immediately decided to make our own jam over the weekend and we turned the gooseberries into the most yummiest pickle (recipe to follow soon).
Showing posts with label breakfast. Show all posts
Showing posts with label breakfast. Show all posts
Monday, 1 September 2014
Home-made Strawberry jam
Recently, we visited our local pick your own farm. We had a fantastic time spending the whole day at the farm, enjoyed a picnic together and we got to pick fresh fruits. It was a fantastic opportunity for Anjalie to see how fruits grow and also for us to enjoy fresh fruits from the farm. Among our haul was gooseberries, strawberries and raspberries. We immediately decided to make our own jam over the weekend and we turned the gooseberries into the most yummiest pickle (recipe to follow soon).
Wednesday, 26 February 2014
Egg-Cheese sandwich (add sausage for more filling meal)
This post is a quick one since it has been a bit over too busy here of late. Egg & cheese sandwich is a quick and easy way to enjoy a lovely breakfast on the go and by adding sausage (chopped) it can make for a more filling meal. It can even make a quick lunch sandwich for one of those busy days. But remember to keep it refrigerated until lunch time :) Anjalie has hers with just salt and black pepper while Naz & I like it a bit more spicy with chilli sauce. So feel free to play around with the filling. You can even add a bit of mustard if you like.

Friday, 27 September 2013
Vegetable kuzhi paniyaram
Off late we have been talking about trying something different for breakfast. I mean, other than the usual bread, crumpets, pancakes or idlis and dosas. I remember trying these paniyarams when I travelled with my parents to Karur, in South India, one summer when I was in high school. I remember that it was totally delicious and we all of us in the family ate them for breakfast every single day during that trip. The trouble was, none in our family know how to make it! I called my friend Boon (who is from that area) and got the recipe (& the vessel to make it) from her. If you do not have one of these paniyaram vessels you can just shallow fry them straight in the frying pan. I added some veggies (like grated carrots and sweet peppers) to the recipe, but, the original recipe just requires onions and other Indian seasoning. It turned out crispy on the outside and soft on the inside and delicious (exactly as I remember it). Kuzhi in Tamil means a dent/hole. These paniyarams are made in a vessel with many dents (see pic below) and hence called kuzhi paniyaram. They can be sweet or savoury. Below is a recipe for the savoury variety.


You will need:
3 cups of idli batter
1 small onion (or use 1/2 med. onion)
1/2 carrot grated
1/4 cup sweet peppers chopped finely
2 fresh green chillies- chopped fine (optional)
1 inch ginger grated or 1/2 tsp ginger paste
1/4 tsp mustard seeds
1/2 tsp oil for seasoning + extra for greasing the pot
salt to taste
1 small onion (or use 1/2 med. onion)
1/2 carrot grated
1/4 cup sweet peppers chopped finely
2 fresh green chillies- chopped fine (optional)
1 inch ginger grated or 1/2 tsp ginger paste
1/4 tsp mustard seeds
1/2 tsp oil for seasoning + extra for greasing the pot
salt to taste
Sunday, 22 September 2013
Anadama Bread
After a little hiatus, that involved holidays with little to no internet access, time spent with Anjalie & family and starting new project at work and the stress that comes with it, I am back with more yummy recipes that is now approved by Anjalie (who is turning 4 this December- where did the time go!) and the rest of the family. It has been a while (2 months!) since I experimented with bread. So here it is- Anadama bread. This one uses corn meal/polenta and is traditional bread from New England. What attracted me to try this was the story of it's origin and the use of molasses as a sweetener instead of sugar. First the story- like many old recipes there are many, but, here is my favourite one- there once was a fisherman who lived in New England with his wife. All she ever fed him was polenta/cornmeal porridge sweetened with molasses. Eventually, he got tired of it and made bread with the porridge by adding bread flour, all the while saying, "Anna, damn her!" which became Anadama bread :)


Tuesday, 4 June 2013
Healthier variation of Trinidadian (fry) bake- baked not fried
We all have childhood favourite dishes that we love very much and associate with comfort food. Some times, unfortunately, they are not the healthiest things around. Trinidadian fry bake is Naz's childhood favourite. Anjalie really enjoys them too. Unfortunately, it involves frying the bread dough which, naturally, is not very healthy. I have been looking and experimenting for a recipe that involves baking them instead of frying and still be able to achieve the same soft texture. The trouble is that the same recipe cannot be used to bake. It involves using baking powder, so, baking the dough will result in biscuits. Secondly, I have previously tried yeast instead of baking powder, but, could not get the pocket in the centre which we get when the dough puffs up during frying. I finally figured out the perfect recipe that gives the replica of "fried" bake, i.e., it is soft and has a pocket in the middle to scoop up tomato choka or to put butter and cheese in. But this version is just healthier having been baked in the oven instead of frying. It only requires very little oil/butter. When I finally served them today, both Naz & Anjalie could not believe that they were not fried. Naz kept on going about how it tastes really great! Just what I wanted to hear :D So, I guess, from now on Trinidad bakes are going to be one of the regular dishes in our home. Again, this goes to show that Healthy food choices does not necessarily mean missing out on our childhood favourites. So without further ado...here is the recipe.

You will need:
2.5 cups all purpose/plain flour (not bread flour)
1 tsp instant dried yeast yeast
1 tsp salt (or to taste)
1 to 1.5 cups lukewarm water (use as required)
1/2 tbsp oil/butter

You will need:
2.5 cups all purpose/plain flour (not bread flour)
1 tsp instant dried yeast yeast
1 tsp salt (or to taste)
1 to 1.5 cups lukewarm water (use as required)
1/2 tbsp oil/butter
Friday, 31 May 2013
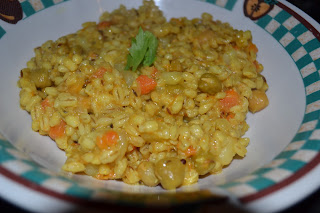
Barley Kichdi
Kichdis along with upma are a sort of quick to make comfort-food cum breakfast dishes in India. Upmas are more popular in the South, while, kichdis are more popular in the North. The main difference between upma and kichdis, given the very many variations of both dishes, is that upma is made with grains and veggies (usually wheat, but, now healthier options like oats are used). Kichdis on the other hand use grains, pulses and veggies. In a way, kichdis are one pot meal that include grains, pulses and vegetables thus completing a well rounded healthy vegetarian breakfast. I have been giving Anjalie barley kichdis from when she was around 8 months old. I used to pressure cook the kichdis for her until she was one year old. To this day she loves kichdis of any kind, but, largely favours barley kichdis. For little children, pressure cook to make sure that the dal and barley are well cooked and mashed and also skip mustard and cumin seeds until the children are a little older (about 1 year). For the recipe...
 You will need:
1 cup pearl barley
½ cup moong dal (split yellow peas) or toor dal (split pigeon peas)
2 tsp oil
¼ tsp mustard seeds + ½ tsp cumin seeds (skip for children less than 1 yr old)
1 small onion
1 can mixed vegetables (100 g of fresh/frozen vegetables)
2 fresh chillies chopped (for adults – optional)
1 inch piece ginger grated
3 tbsp grated coconut (fresh or desiccated + 2 tbsp coconut milk)
¼ tsp turmeric powder
Salt to taste
1 tsp lemon juice
1 cup water (more or less)
Coriander leaves for garnish
 You will need:
1 cup pearl barley
½ cup moong dal (split yellow peas) or toor dal (split pigeon peas)
2 tsp oil
¼ tsp mustard seeds + ½ tsp cumin seeds (skip for children less than 1 yr old)
1 small onion
1 can mixed vegetables (100 g of fresh/frozen vegetables)
2 fresh chillies chopped (for adults – optional)
1 inch piece ginger grated
3 tbsp grated coconut (fresh or desiccated + 2 tbsp coconut milk)
¼ tsp turmeric powder
Salt to taste
1 tsp lemon juice
1 cup water (more or less)
Coriander leaves for garnish
Sunday, 28 April 2013
Vegetable Uttappam (South Indian griddle cakes)
Uthappams make a great and balanced part of breakfast. It is made with dosa batter. It is quick and easy to make as well with left over dosa batter. More than idlis and dosas kids tend to like uttappam due to the attractive colours which is great since they will get to enjoy fresh veggies :) I had made dosa batter two days ago and had a little bit of it left over this morning. So with a little fresh veggies, we had a yummy and healthy breakfast. Instant Uttappam mixes are available, however, I am not sure what additional ingredients are added to keep them good. I prefer to make my own dosa batter and use it. This way I can make, idlis, dosas and uttappam with the same batter :)

For the dosa batter you will need:
1 cup white rice
1 cup parboiled rice
3/4 cup urad dhal (preferably skinned whole)
salt to taste
For the uttappam (any combination of the following):
sweet peppers chopped fine
carrots grated
cabbage grated/shredded
onion chopped fine
sweet corn
fresh green chillies chopped (for adults)
corriander coarsely chopped

For the dosa batter you will need:
1 cup white rice
1 cup parboiled rice
3/4 cup urad dhal (preferably skinned whole)
salt to taste
For the uttappam (any combination of the following):
sweet peppers chopped fine
carrots grated
cabbage grated/shredded
onion chopped fine
sweet corn
fresh green chillies chopped (for adults)
corriander coarsely chopped
Sunday, 21 April 2013
Spanish Omelette
This one is our typical brunch favourite for the entire family here. Despite being a vegetarian I do eat and like eggs in all forms. So this is perfect as a late brunch during weekends and holidays after a much needed lie-in in the mornings. It is healthy, quick and very filling. For those counting calories or worried about their cholesterol level, this can be made with just egg whites. Despite making this very often at home I have not had a chance until today to take pictures for a step-by-step recipe for this blog. The main reason being this dish usually features as brunch/breakfast and I am usually attempting to do this quickly and set the table for us before Anjalie gets too hungry. Our family loves all things with potatoes and this is no exception. We do like a lot of potatoes in our omelette. But you can adjust according to your taste. The authentic Spanish Omelette does not have anything other than onions and potatoes. I make ours that way as well and serve it with a side of grilled mushrooms and tomatoes. But you can add sweet peppers, mushroom, tomatoes etc and cheese if you prefer.

You will need:
1/2 med onion finely chopped
3 medium potatoes - peeled and sliced thinly to 1/4 inch
3 large eggs
2 tbsp milk
salt and black pepper to taste
3 tbsps oil

You will need:
1/2 med onion finely chopped
3 medium potatoes - peeled and sliced thinly to 1/4 inch
3 large eggs
2 tbsp milk
salt and black pepper to taste
3 tbsps oil
Saturday, 30 March 2013
Scrambled eggs & toast for kids
When I asked Anjalie what she would like for breakfast, this morning, the reply was an emphatic "scramble eggs, please!". Five days out of seven she asks for "scrambled eggs" and I realized, this morning, strangely her favourite breakfast recipe has not yet appeared in my blog here. So I decided to rectify it asap. Not only is this Anjalie's favourite it is also enjoyed very much by the rest of us here. It is part of a healthy breakfast as well with protein rich eggs and vitamin rich veggies like sweet peppers and tomatoes. We normally eat them with toast, but, sometimes we enjoy them with crepes as well. It is also very quick and easy to make. I make mine with just egg whites since I am counting my calorie in-take. So without further ado, here is he recipe...
 You will need (per serving size):
2 large eggs
2 tbsp milk
1/2 sweet pepper chopped
1/2 tomato chopped
1/4 onion chopped
salt and black pepper to taste
1 tsp oil/butter
1 wholemeal toast-buttered

2 large eggs
2 tbsp milk
1/2 sweet pepper chopped
1/2 tomato chopped
1/4 onion chopped
salt and black pepper to taste
1 tsp oil/butter
1 wholemeal toast-buttered
Monday, 25 March 2013
Honey Partybrot/Partybread (water roux method)
Partybrot are traditional Swiss-German rolls, baked as one, in a round pan. As the name suggests partybrot is perfect for sharing. I received a new pot of home-made honey from a friend today and I really wanted to try it tonight (asap). I had wanted to make this tear off bread to share. I just used honey to make a sweet partybrot. It is a weekday but I could not wait to try the fresh honey. So, I quickly made a snack, veggie cutlets, for us while I prepared the partybrot. It was late dinner tonight but was well worth the wait :) I have had great success with water roux method so I used it for making this one too and the end result was perfect, fluffy and soft like cloud bread that was sweet with great honey flavor. Anjalie loved the tear-off part and insisted on tearing off the bread for us too :)

You will need:
For water roux:
40 grams of bread flour
200 grams of water
For the dough:
Roux made from above
300 grams of bread flour
1/2 tsp salt
1 egg lightly beaten egg
1 tsp instant active dry yeast
225-250 grams**(yes, by weight) of lukewarm milk
50 grams of honey (add more if you like them sweeter)
30 grams unsalted butter + more to smear on top
Egg wash (optional): 1 egg + 2 tbsp milk

You will need:
For water roux:
40 grams of bread flour
200 grams of water
For the dough:
Roux made from above
300 grams of bread flour
1/2 tsp salt
1 egg lightly beaten egg
1 tsp instant active dry yeast
225-250 grams**(yes, by weight) of lukewarm milk
50 grams of honey (add more if you like them sweeter)
30 grams unsalted butter + more to smear on top
Egg wash (optional): 1 egg + 2 tbsp milk
Saturday, 23 March 2013
Hot-Cross Buns (just in time for Easter) with water roux
Hot cross buns! Hot cross buns!
One a penny, two a penny
Hot cross buns!
With Easter almost upon us, I had a few requests to make my hot-cross buns. This time around, I had decided to try out the water roux method to make these soft melt in your mouth sweet buns even more soft! These traditional buns are very popular here in UK during the Easter time. The traditional cross on these Easter buns probably symbolized the four the seasons and were made during the spring time to point out the end of winter time and the cycle of seasons. But later the cross was associated with Good Friday and the Crucifixion. Regardless, they taste great and are perfect for this time of the year with the smell of spices and mild sweet taste of the dried fruits.
Like many traditional recipes hot-cross buns have many variations. Traditionally the crosses were made with shortcrust pastry. There are recipes that use plain flour and margarine and/or water to make the crosses. I make mine with royal icing (egg whites and icing sugar). If you do not want a sweet tasting crosses, you can use either shortcrust pastry or plain flour and margarine method. Also for the getting the shiny sticky look the hot-cross buns are usually glazed using one of these options: 3 tbsp of apricot jam + 3 tbsp of water- heated up to dissolve completely and sieved or 3 tbsp of sugar + 3 tbsp of milk- heated up to dissolve completely or 3 tbsp of sugar + 3 tbsp of water- heated up to dissolve completely. Again, I use a different glaze here with condensed milk instead. Here is the recipe I have used...
 You will need:
water roux prepared as given here
1 - 1 and 1/4 cup warm milk
1 egg/ egg substitute (optional)
4 cups unbleached white bread flour
1 and 1/2 tsp apple pie spice or
1/2 tsp each of ground ginger, nutmeg and all spice
1/2 tsp of ground cinnamon
1/2 tsp salt
1/4 cup granulated sugar
1/4 cup butter
1 and 1/2 tsp of rapid-raise active dry yeast
1/2 cup currants
3 tbsp golden raisins
3 tbsp mixed candied fruit peel
egg wash (optional): 1 egg + 3 tbsp milk
For Glaze:
2 tbsp milk
2 tbsp sweetened condensed milk
For the crosses: (choose other methods if you want to avoid using eggs)
3/4 cup icing sugar
1 medium egg white
Sunday, 17 March 2013
Trinidadian Doubles (home-made)
Trinidad doubles is a delicious street food from Trinidad and Tobago. It is totally delectable sandwich made from fried dough, called Bara, with curried chickpeas filling. It is usually topped with variety of chutneys such as mango, tamarind and cucumber chutneys etc. It is usually served with hot pepper sauce made from Habernero/Scotch Bonnet peppers and the amount can be varied according to your taste. In Trinidad they use "bun danya/Mexican coriander" which is used for garnishing much like the Indian coriander. See here for more info on this plant.
Doubles is usually eaten for breakfast in Trinidad, but, some times it is eaten as evening snack as well. It is the first Trinidad food that I fell in love with. I enjoy it so much that whenever we go to visit our family there they always make sure and have it for me everyday :) Click here for a video of a vendor selling doubles in Trinidad streets on Youtube (FYI).
Monday, 11 March 2013
Buckwheat and Semolina (sooji/rava) dhokla
Dhokla is a typical breakfast and/or snack from the North west of India, in particular, Gujarat. It is commonly made with fermented rice and chickpeas flours or with semolina (without fermenting). It is somewhat similar to the South Indian Idlis. The fluffy and soft texture and tangy taste of the dhokla is like a piece of heaven! More over, it is very healthy, does not use too much oil since it is mainly steam cooked and is very filling so makes a great breakfast dish or perfect as a after school snack. This is indeed a very popular dish in the North of India as well as at our home. It was even a great success as party food during Anjalie's birthday :)
I used to make dhokla's with sooji often since it is quick and easier to prepare compared to the chickpea dhokla which requires fermentation. Now I have discovered something much more healthier and that is buckwheat. Buckwheat has a nutty and strong flavor compared to semolina and has low Glycemic Index (GI). In fact, it is one of the grains with the lowest GI. See http://whfoods.org/genpage.php?tname=faq&dbid=32 for a list of grains and their GI. It is perfect for those suffering from diabetes and those who are on low-carb diets. Buckwheat is as wholesome as the grains get, see http://www.whfoods.com/genpage.php?tname=foodspice&dbid=11. Given all the benefits of buckwheat (called Kuttu/kutto in India and Kasa in Russian and parts of Easter Europe) I now use buckwheat and semolina (sooji) in equal amounts to make my dhokla. If you are more worried about your health, you can replace all of the sooji with buckwheat. The resulting dhokla will be slightly more dense than the once using sooji. But will taste great nonetheless. Using a mixture of sooji and buckwheat also gives double colored (yellow and brown) dhoklas making it visually appealing for children :)
Dhoklas are steamed in plates placed inside a container such as pressure cooker. But you can use stainless steel plates and/or cake pan and steam the dhoklas in a stock pot. In fact, you can even steam them in coffee mugs! Just increase the time for steaming to 30-40 mins.
 You will need:
I used to make dhokla's with sooji often since it is quick and easier to prepare compared to the chickpea dhokla which requires fermentation. Now I have discovered something much more healthier and that is buckwheat. Buckwheat has a nutty and strong flavor compared to semolina and has low Glycemic Index (GI). In fact, it is one of the grains with the lowest GI. See http://whfoods.org/genpage.php?tname=faq&dbid=32 for a list of grains and their GI. It is perfect for those suffering from diabetes and those who are on low-carb diets. Buckwheat is as wholesome as the grains get, see http://www.whfoods.com/genpage.php?tname=foodspice&dbid=11. Given all the benefits of buckwheat (called Kuttu/kutto in India and Kasa in Russian and parts of Easter Europe) I now use buckwheat and semolina (sooji) in equal amounts to make my dhokla. If you are more worried about your health, you can replace all of the sooji with buckwheat. The resulting dhokla will be slightly more dense than the once using sooji. But will taste great nonetheless. Using a mixture of sooji and buckwheat also gives double colored (yellow and brown) dhoklas making it visually appealing for children :)
Dhoklas are steamed in plates placed inside a container such as pressure cooker. But you can use stainless steel plates and/or cake pan and steam the dhoklas in a stock pot. In fact, you can even steam them in coffee mugs! Just increase the time for steaming to 30-40 mins.
 You will need:
50 grams of buckwheat groats (wholegrain kasa/kutto)
50 grams of medium Semolina (sooji)/ whole wheat rava
100 grams of plain yogurt (I use Greek Style)
1 tsp salt
1 tsp sugar (granulated)
2 chillies chopped finely (for adults)
1 tsp grated ginger/ginger paste
1/2 tsp turmeric powder
150 ml water + 50 ml water for later
2 tbsp of lemon juice
1/2 tsp baking soda
1 tbsp cooking oil (for greasing)
2 tbsp coarsely chopped coriander for garnish
for tempering (optional)
1 tsp cooking oil
1 tbsp cumin seeds
1 tsp mustard seeds
1 tsp sesame seeds
Sunday, 10 March 2013
Oats-Maple syrup Bread
We often hear the health benefits of Oats. See http://wholegrainscouncil.org/whole-grains-101/health-benefits-of-oats. But to me incorporating more than one type of wholegrain in the diet is more beneficial to replacing one by another all together.
Ever since I tried to make a conscious change in my diet, whole meal oats has been part of the staple in our home. However, both Anjalie and Naz turn their nose up at cooked oat's gooey texture. So I try to come up with different ways of cooking and/or including oats that does not give the gooey texture. So far, I have had successes with Oats upma, oats bhel and oats dosa. But tonight I wanted to try oats in bread along with the perfect compliment for oats (IMO) and my personal favorite for flavor: Maple syrup. While, I would love to make bread with mostly oats, I am aware that oats does not contain much gluten and hence for a yeast bread I will need to use bread flour to provide the gluten. Here is a recipe that has wholemeal and white flour to provide the gluten. Using strong bread flour will give more fluffy and softer bread.
 You will need:
1 and 1/2 cup warm water,
2 tbl spoon Maple syrup (add an additional tbl spoon if you like sweeter bread),
3 and 3/4 cup strong bread flour,
1/2 cup strong wholemeal bread flour,
1/4 cup rolled oats,
1 tbl spoon oat bran,
1 tsp salt,
1 tsp granulated sugar,
2 tbl spoon butter
1 tsp rapid-raise yeast.
Ever since I tried to make a conscious change in my diet, whole meal oats has been part of the staple in our home. However, both Anjalie and Naz turn their nose up at cooked oat's gooey texture. So I try to come up with different ways of cooking and/or including oats that does not give the gooey texture. So far, I have had successes with Oats upma, oats bhel and oats dosa. But tonight I wanted to try oats in bread along with the perfect compliment for oats (IMO) and my personal favorite for flavor: Maple syrup. While, I would love to make bread with mostly oats, I am aware that oats does not contain much gluten and hence for a yeast bread I will need to use bread flour to provide the gluten. Here is a recipe that has wholemeal and white flour to provide the gluten. Using strong bread flour will give more fluffy and softer bread.
 You will need:
1 and 1/2 cup warm water,
2 tbl spoon Maple syrup (add an additional tbl spoon if you like sweeter bread),
3 and 3/4 cup strong bread flour,
1/2 cup strong wholemeal bread flour,
1/4 cup rolled oats,
1 tbl spoon oat bran,
1 tsp salt,
1 tsp granulated sugar,
2 tbl spoon butter
1 tsp rapid-raise yeast.
Friday, 8 March 2013
Sourdough starter (Rye)
Sourdough bread is the oldest method of making yeast breads. In this method naturally occurring yeast in the flour and the air are captured and cultured on a basic flour-water combination called starter. This starter is then maintained with regular feeds until the yeast provides a perfect environment for lactic acid bacteria. Both lactic acid bacteria and the naturally occurring "wild yeast" then form a symbiotic relationship thus growing together. Such a starter can be maintained by regularly feeding them and can last as long as one wants. The commercially available yeast cannot survive in this environment. Certain types of bread such as rye-bread (without adding any wheat flour) come out much better with sourdough than commercial yeast. Due, to the presence of lactic acid bacteria, sourdough breads obtains a slightly fermented sour taste leading to an incredibly tasty tangy bread, yum!
Naturally occurring yeast are present in most of the flour we buy. So adding water to the flour and keeping it in a warm place is all that is needed to create a hospitable environment for the yeast to grow which then naturally offers a nice place for the lactic acid bacteria. There are more than one reasons for eating sourdough bread and not the least of them is the yummy sour taste! Sourdough breads have low glycemic index than bread made from commercial yeast. See http://www.simplebites.net/the-health-benefits-of-sourdough-bread-recipe-whole-grain-sourdough-bread/ For the more curious among you I will refer you to http://www.kitchenstewardship.com/2010/03/05/food-for-thought-health-benefits-of-sourdough/ for the health benefits of sourdough. For more information on the techniques and details of sourdough starters and breads, please see, http://www.sourdoughhome.com/index.php
This time around (yes, I have done this before) my intention was to bake a sourdough rye bread this weekend. So I needed a rye-flour starter (I already have a white bread flour starter). So here is how I made my rye starter...
DAY 1 (05/03/2013): I combined 2 generous table spoons (40 grams) of stone ground wholemeal rye flour with 40 grams of water in a clean (well washed, rinsed and sterilised container). I marked the level of my starter with a red permanent marker, covered the top of the container with cling film & rubber band and loosely placed the lid on top. Remember to use a clean spoon to mix the dough at all times. It is very easy to contaminate and introduce other organisms, like mold, into this environment. I keep a wooden chopstick for this use that I never use for anything else.

I left it in the warmest place in my house, i.e., on top of the refrigerator.
DAY 2 (06/03/2013): 24 hrs later, more or less, I felt incredibly lucky to spot a few bubbles in my starter indicating the growth of yeast. This has happened quite quickly for me. It can sometimes take up to 3 days for the wild yeast to start growing in the starter, so, patience is the key. I added another 20 grams of rye flour and 20 grams of water, mixed well, marked the level again and left it back on top of the refrigerator.

DAY 3 (07/03/2013): Another 24 hrs later, on day 3, I could clearly see (below) more bubbles formed by the yeast growth even on the side of the bottle, yay! There was also a slight sour smell indicating the lactic acid bacteria had joined the party! Fed my starter another 20 grams of flour and 20 grams of water, marked the level again and left it to rest.

4 hours later... the level of my starter had nearly doubled indicating my starter indeed was alive and doing well.

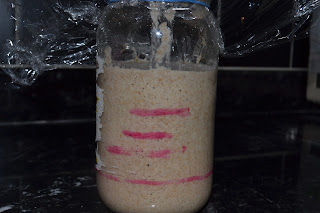
DAY 4 (today 08/03/2013): There is a distinct sour smell (like beer) and the top looks very frothy (see below).


Naturally occurring yeast are present in most of the flour we buy. So adding water to the flour and keeping it in a warm place is all that is needed to create a hospitable environment for the yeast to grow which then naturally offers a nice place for the lactic acid bacteria. There are more than one reasons for eating sourdough bread and not the least of them is the yummy sour taste! Sourdough breads have low glycemic index than bread made from commercial yeast. See http://www.simplebites.net/the-health-benefits-of-sourdough-bread-recipe-whole-grain-sourdough-bread/ For the more curious among you I will refer you to http://www.kitchenstewardship.com/2010/03/05/food-for-thought-health-benefits-of-sourdough/ for the health benefits of sourdough. For more information on the techniques and details of sourdough starters and breads, please see, http://www.sourdoughhome.com/index.php
DAY 1 (05/03/2013): I combined 2 generous table spoons (40 grams) of stone ground wholemeal rye flour with 40 grams of water in a clean (well washed, rinsed and sterilised container). I marked the level of my starter with a red permanent marker, covered the top of the container with cling film & rubber band and loosely placed the lid on top. Remember to use a clean spoon to mix the dough at all times. It is very easy to contaminate and introduce other organisms, like mold, into this environment. I keep a wooden chopstick for this use that I never use for anything else.

I left it in the warmest place in my house, i.e., on top of the refrigerator.
DAY 2 (06/03/2013): 24 hrs later, more or less, I felt incredibly lucky to spot a few bubbles in my starter indicating the growth of yeast. This has happened quite quickly for me. It can sometimes take up to 3 days for the wild yeast to start growing in the starter, so, patience is the key. I added another 20 grams of rye flour and 20 grams of water, mixed well, marked the level again and left it back on top of the refrigerator.

DAY 3 (07/03/2013): Another 24 hrs later, on day 3, I could clearly see (below) more bubbles formed by the yeast growth even on the side of the bottle, yay! There was also a slight sour smell indicating the lactic acid bacteria had joined the party! Fed my starter another 20 grams of flour and 20 grams of water, marked the level again and left it to rest.

4 hours later... the level of my starter had nearly doubled indicating my starter indeed was alive and doing well.

DAY 4 (today 08/03/2013): There is a distinct sour smell (like beer) and the top looks very frothy (see below).

So I gave it another feed and saw it come alive after 2 hrs
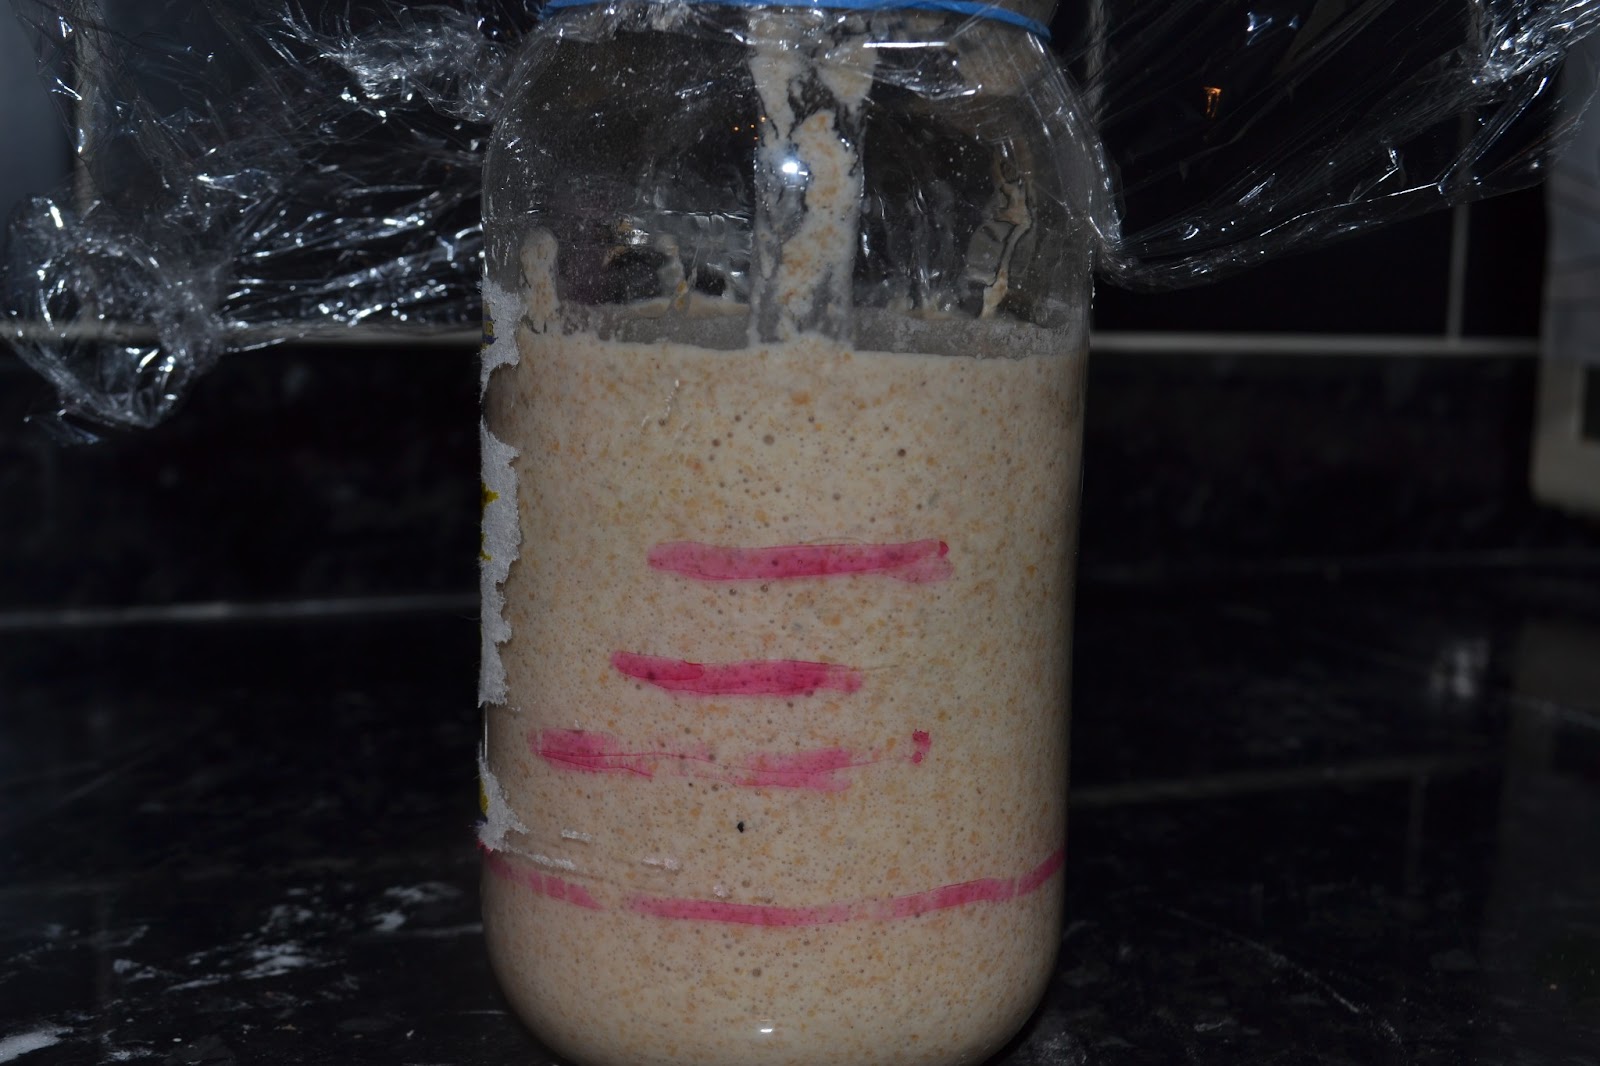
This probably will be my last feed without taking out any of the old starter. Mainly because I have reached the amount of starter I need, to bake my bread and then have a little bit left for maintaining it for future use, and if I keep adding any more there won't be room for it to grow! So the next time I feed, I will throw away 40 grams of my starter and add 20 grams of flour and 20 grams of water, leave it to rest and then pop it back in fridge after 2-3 hrs.
So this starter is now going to go into to the refrigerator (for storage) until I am ready to bake my bread (this weekend hopefully). This starter can be now maintained indefinitely for the future as long as I feed it regularly: everyday if it is outside (beware that mold can grow if we are not careful) or every other day in the warm part of the refrigerator or every 3 days in the coldest part. The day before I am ready to bake my bread, I will feed the starter a few times (about 4) by throwing away half of the starter and feeding with the exact amount of flour and water I removed. I will then use as much starter as I need for the bread (according to the recipe) and then replenish my starter by the same amount and leave it back in the fridge for future use. Pretty much this is my own personal yeast source that I can pretty much use it for making anything from bread to pizzas to pancakes, awesome!
Note:
- The starter is incredibly easy to make, but, it is not exactly guaranteed. It may take more or less time and the results may vary depending on the environment and a lot of factors.
- There are lot of advice against using starters that are less than a week old. But I have not had any problem before. Being a Physicist who works in Biological Sciences, I am pretty convinced that the symbiotic relationship between yeast and lactic acid bacteria once established will create an environment that may not be suitable for other organisms. Even if there is anything else, harmful growing, I am sure it will be killed at the cooking process. However, I leave it to your discretion.
- There are many different techniques to make sourdough. But I found this one the simplest and easiest to follow.
- Some people claim that the chlorine in the tap water kills the yeast and suggest using filtered water. But I have so far never had a problem with using tap water to make sour dough.
Update (over the weekend on 11/03/2013)):

I have kept the starter in the fridge. But took it out on 10/03/2013 and threw away 80 grams of the starter and replaced/fed it again with 40 grams of rye flour and 40 grams of water. I left the starter outside for 4 hrs and put it back in the fridge. On Sunday (10/03/2013) when I took it out of the fridge, to feed, the starter had a clear liquid on the top that had separated and smelled fantastic with sour taste (See left side pic). Wish you could smell it too! Anyway, the starter is now "ripe" and perfect for making sourdough bread. I had planned on baking sourdough bread this weekend. But it turned out that yesterday was Mothering Sunday and I had enough on my plate to worry about sourdough bread. So I just plan on continuing with the feeding every other day and bake the sourdough bread at the next chance I get. So please bear with me :)
Sunday, 3 March 2013
Aloo/Potato puri
Puri is unleavened bread just like roti, except, it is deep fried giving it a crispy-soft texture. Like most Indian unleavened bread, puris can be eaten as part of any of your meals and is versatile. Given a choice between puri and roti most children will pick puri due to the crispy texture and yummy taste of fried dough. Anjalie is just the same. In particular, she loves Aloo/potato puri. Potatoes makes the puri more soft and moist at the same gives a delicious taste. Aloo puris usually have a variety of spices and herbs added along with the potatoes to the dough and the collection of spices used usually depend on and varies from family to family. Some of fresh herbs typically used are coriander leaves, fenugreek (methi) leaves or fresh chillies. Some of typical spices used are dried mango (amchur), cumin powder and black pepper. Since Anjalie, like most children, prefers simple aloo puri with just mashed potatoes I have given the recipe for that. Feel free to add your favorite spices and herbs to the dough according to your taste. Just the plain aloo puri given here is very tasty and moist due to the potatoes that we, the adults, have started to enjoy it as much as Anjalie does.
Home-made Crumpets
It was Sunday morning (a few hrs ago) and my little daughter, whose favorite activity is to cook with Mummy asked, "Mummy, what are we making to eat?". The key word here is "we". So I took the hint and thought toast somehow will not cut it today and decided to make crumpets and she will be able to help with the mixing the dough part of it. After I told her about it, my daughter beamed at me saying, "yay! crumpets!", letting me know that she was doubly pleased :)
Crumpets are very popular here, in the UK, and are eaten for afternoon tea or even sometimes for breakfast. They are not spicy or strange, and make for great finger food, making it easy for children to eat. Whenever our family visits us from Trinidad or India they like to eat these everyday. They love it so much that they complain that they unable to get them in their hometowns! Funny thing is that I did not realize how easy it is to make them at home until recently and home-made ones tastes way better than the store bought crumpets. Now, why is that not a big surprise? So let's get to the recipe...
 You will need (for making 8-10 medium crumpets):
225 g/8 oz plain/all purpose flour
150 ml warm water + 2 tbsp warm
150 ml warm milk
1/2 tsp salt
1 tsp sugar
1 tsp active dried yeast
1 tsp butter
1/2 tsp baking soda
cooking oil to grease the skillet and crumpet rings/cookie cutters (if using)
Crumpets are very popular here, in the UK, and are eaten for afternoon tea or even sometimes for breakfast. They are not spicy or strange, and make for great finger food, making it easy for children to eat. Whenever our family visits us from Trinidad or India they like to eat these everyday. They love it so much that they complain that they unable to get them in their hometowns! Funny thing is that I did not realize how easy it is to make them at home until recently and home-made ones tastes way better than the store bought crumpets. Now, why is that not a big surprise? So let's get to the recipe...
 You will need (for making 8-10 medium crumpets):
225 g/8 oz plain/all purpose flour
150 ml warm water + 2 tbsp warm
150 ml warm milk
1/2 tsp salt
1 tsp sugar
1 tsp active dried yeast
1 tsp butter
1/2 tsp baking soda
cooking oil to grease the skillet and crumpet rings/cookie cutters (if using)
Friday, 1 March 2013
Barley dosai and idlis with green chutney
I am not a health freak. But I am heath conscious. This means that I do not obsess over only eating healthy food. But I moderate unhealthy food and try to mix in as much healthy food in my diet as possible. Looking back at how and when I started being health conscious, I can clearly point out that, I started to eat healthy since the day I realized that I was pregnant. It is the fact that I am now responsible for another life and that it is up to me and Naz to help the child to grow up healthy, happy and become a responsible adult that caused this change in me. One of the changes I have made for healthy diet is to choose food with low glycemic index whenever possible. This became more easier once I started to look beyond the usual recipes that call for rice and wheat based products. Introducing other whole grains like, barley and buckwheat has resulted in tasty and healthy food for the whole family. Food with low glycemic index are particularly great for those suffering from diabetes. They are also great for maintaining a healthy energy level through out the day and avoid feelings of low energy and fatigue. Parents of small children, I am sure, will totally appreciate this ;) For more information on Glycemic Index, you can read,
http://whfoods.org/genpage.php?tname=faq&dbid=32
http://whfoods.org/genpage.php?tname=faq&dbid=32
Tuesday, 12 February 2013
Kancheepuram Idlis/Kovil Idlis (Iyengar style)
Kancheepuram idlis/Kovil idlis, literally translate to temple idlis. These idlis are a specialty of the Sri Varadharajar temple in Kancheepuram which is also my parents' home town. In a way this is an authentic recipe and it works here as well. At our home in Chennai (& here) we make these on festival days for breakfast.
 You will need:
PARBOILED RICE (puzhungal arisi)- 1 & 1/2 CUPS
LONG_GRAIN WHITE RICE (pacharisi) 1/2 CUP
URAD DHAL 2 CUPS
BLACK PEPPER 1 TSP
CUMIN SEEDS 1/2 TSP
DRIED GINGER POWDER (sukku podi) 1/2 TSP
PLAIN YOGURT 1 CUP
SESAME OIL 4 TBLSP
GHEE/MELTED BUTTER 4 TSP - 8 TSP (4 being the low-calorie idlis)
SALT AS NEEDED.

PARBOILED RICE (puzhungal arisi)- 1 & 1/2 CUPS
LONG_GRAIN WHITE RICE (pacharisi) 1/2 CUP
URAD DHAL 2 CUPS
BLACK PEPPER 1 TSP
CUMIN SEEDS 1/2 TSP
DRIED GINGER POWDER (sukku podi) 1/2 TSP
PLAIN YOGURT 1 CUP
SESAME OIL 4 TBLSP
GHEE/MELTED BUTTER 4 TSP - 8 TSP (4 being the low-calorie idlis)
SALT AS NEEDED.
Rice-lentil Adai with onion-tomato chutney
Adai is one of my childhood favorites. Despite, hailing from Chennai, I never cared much for idlis when I was a child. But I loved Adai. With equal amount of rice and dals (Toor dal and Channa dal) it is very healthy and tasty food for children. Adai is a variety of the South-Indian dosa, but, the batter should be a little thicker than dosa batter. The adai being naturally lower in calorie it is great for the entire family. I used to eat adai with vellam/jaggery. But both Naz & Anjalie prefer a chutney and in particular Anjalie loves the Onion-Tomato chutney. I like to make my Onion-Tomato chutney with slightly more tangy by using canned tomatoes. You can adjust the ingredients according to your taste.
This is great for breakfast. It fills you up and keeps you going until late in the afternoon.
For ADAI
 You will need:
This is great for breakfast. It fills you up and keeps you going until late in the afternoon.
For ADAI
 You will need:
Parboiled rice 1 cup
Toor dhal 1/2 cup
Channa dal 1/2 cup
grated ginger 1/2 tsp (optional)
Toor dhal 1/2 cup
Channa dal 1/2 cup
grated ginger 1/2 tsp (optional)
Red chilli 4-5
4 shallots/ 1/2 big onion finely chopped
asafoedita 1/4 tsp
4 shallots/ 1/2 big onion finely chopped
asafoedita 1/4 tsp
2 whole fresh green chillies (optional)
curry leaves 5-6 leaves (optional)
salt to taste
curry leaves 5-6 leaves (optional)
salt to taste
1 tbsp coconut powder (optional)
1 tbsp oil for lubricating the skillet/tawa (optional)
1 tbsp oil for lubricating the skillet/tawa (optional)
Subscribe to:
Posts (Atom)